
Multi-factor authentication (MFA) adds a second verification step beyond your password, reducing account compromise risk by over 99%. Even if your password is stolen, MFA helps keep your account secure.
Most users who have a smartphone and want convenient, secure access.
Requires pre-approval and additional hardware.
Users who want maximum security, share computers, or have compliance requirements.
Not sure which to choose? The Mobile Authenticator is a great fit for most users—it's free, convenient, and very secure. YubiKey provides the highest level of security and is ideal for administrators or executives.
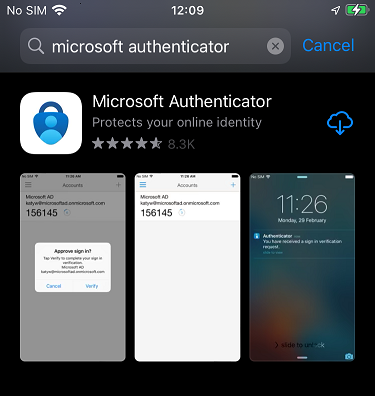
Open the App Store and search for "Microsoft Authenticator." Download and install the free app from Microsoft Corporation.
Open your browser and go to aka.ms/mfasetup (or mysignins.microsoft.com/security-info). Sign in with your work email and password if prompted.
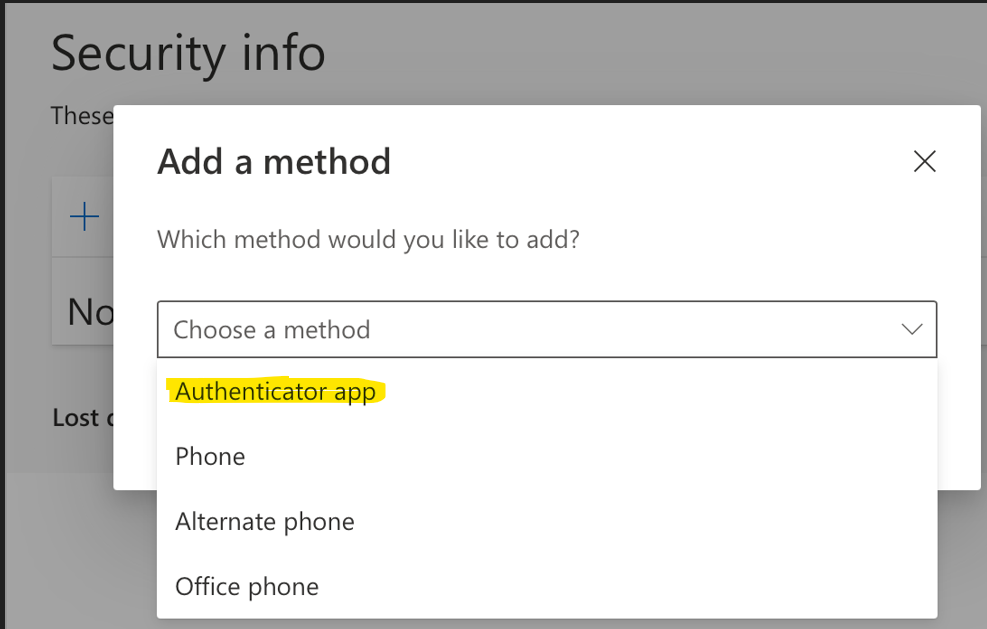
On the Security Info page, click "Add sign-in method". From the dropdown, select "Authenticator app" and click "Add".
Click "Add sign-in method" to begin
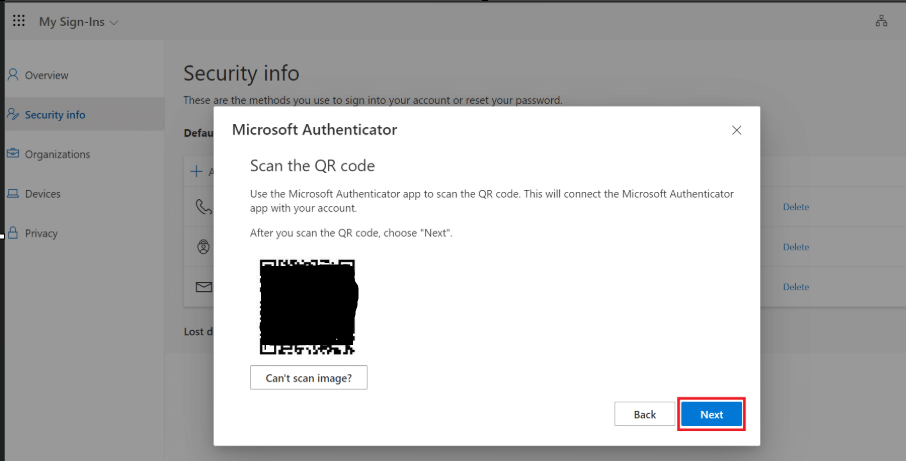
Click "Next" on the wizard screen. Microsoft will display a QR code you'll use to link your account to the Authenticator app.
The setup wizard will guide you through
Open Microsoft Authenticator on your device, tap the "+" button in the top right, select "Work or school account", then tap "Scan QR code" and point your camera at the QR code on your computer screen.
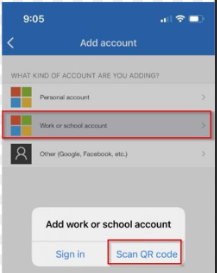
Scan the QR code with your phone
After scanning, click "Next" on your computer. You'll receive a test notification in the Authenticator app. Tap "Approve" to verify the setup.
Once approved, your Microsoft Authenticator is ready to use. You'll use it to approve sign-in requests going forward.
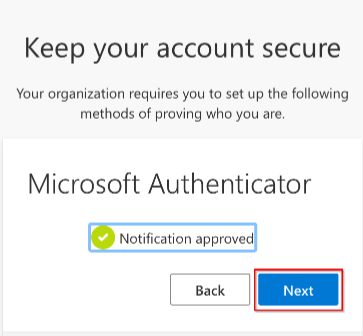
Approve the test notification
Open the Google Play Store and search for "Microsoft Authenticator." Download and install the free app from Microsoft Corporation.
Search for Microsoft Authenticator
Open your browser and go to aka.ms/mfasetup (or mysignins.microsoft.com/security-info). Sign in with your work email and password if prompted.
On the Security Info page, tap "Add sign-in method". From the dropdown, select "Authenticator app" and tap "Add".
Select Authenticator app method
Tap "Next" on the wizard screen. Microsoft will display a QR code you'll use to link your account to the Authenticator app.
Setup wizard displays QR code
Open Microsoft Authenticator on your Android device, tap the "+" button, select "Work or school account", then tap "Scan QR code" and scan the QR code on your screen.
Point your camera at the QR code
After scanning, tap "Next" on your device. You'll receive a test notification in the Authenticator app. Tap "Approve" to verify the setup.
Once approved, your Microsoft Authenticator is configured and ready to use.
Approve the test notification
Ensure you have a YubiKey 5 series (5 NFC, 5C, 5Ci, etc.) or YubiKey Security Key series. These support FIDO2/WebAuthn, which is required for Microsoft 365.
Note: Older YubiKey models (YubiKey 4 and earlier) do not support FIDO2 and will not work with this setup.
Go to aka.ms/mfasetup (or mysignins.microsoft.com/security-info) and sign in with your work credentials.
Click "Add sign-in method", select "Security key" from the dropdown, and click "Add".
Note: Make sure to select "Security key" (for FIDO2 devices like YubiKey), not "Hardware token" (which is for different OATH TOTP devices).

Select "Security key" from the dropdown
You'll be asked how you want to connect your YubiKey:
Choose the method you're using now and click "Next". If your YubiKey supports both, you can use either method after setup.
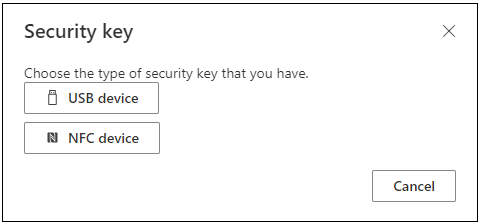
Choose USB or NFC
Insert your YubiKey into a USB port (or tap it on an NFC reader). Your browser will prompt you to activate your security key.
First-time setup: You'll create a PIN for your YubiKey. Choose a strong PIN you'll remember—you'll need it every time you sign in.
Touch the gold sensor on your YubiKey when prompted to complete registration.
Create your PIN and touch the key
Give your YubiKey a recognizable name (e.g., "Office YubiKey" or "Primary Security Key"). Click "Next" to complete setup.
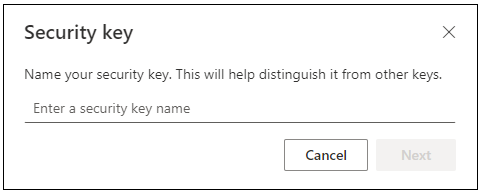
Name your security key
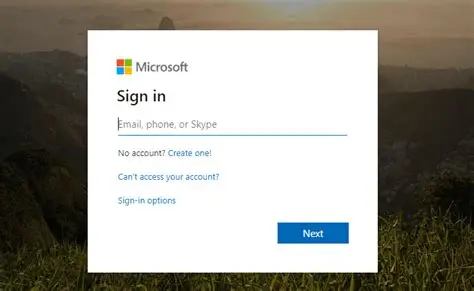
Test by signing into Microsoft 365. You can use your YubiKey as a second factor with your password, or for completely passwordless sign-in.
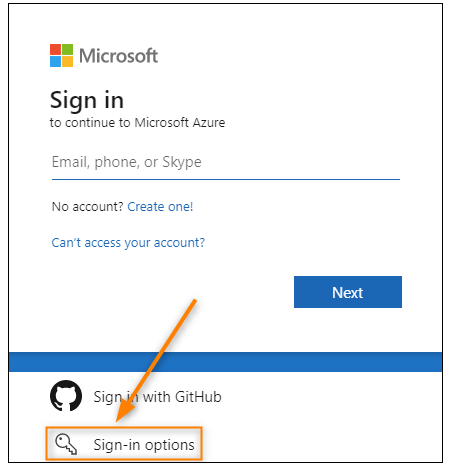
Microsoft 365 sign-in page
Click "Sign-in options" below the password field, then select "Sign in with a security key". This lets you sign in without typing your password.
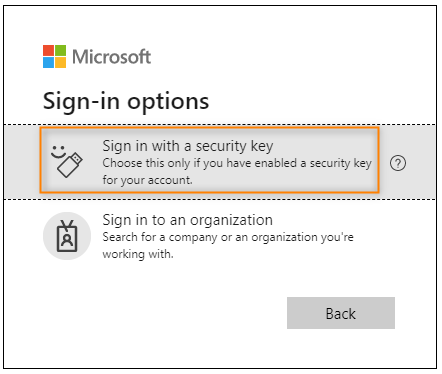
Select "Sign in with a security key"
When prompted, insert your YubiKey into a USB port (or tap it if using NFC). Your browser will detect the security key.
Browser prompts for security key
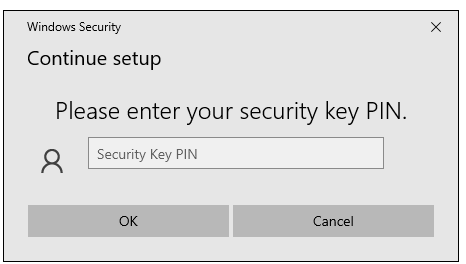
Enter the PIN you created during setup. This confirms you're authorized to use this YubiKey.
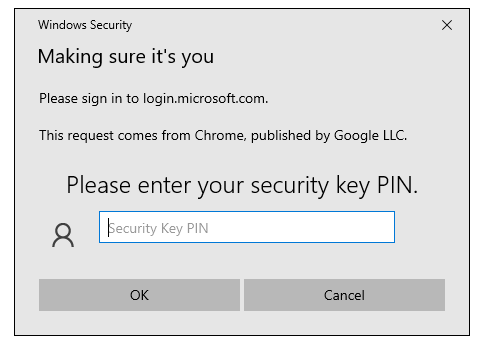
Enter your security key PIN
Touch the gold sensor on your YubiKey when it starts blinking. This confirms you're physically present with the key.
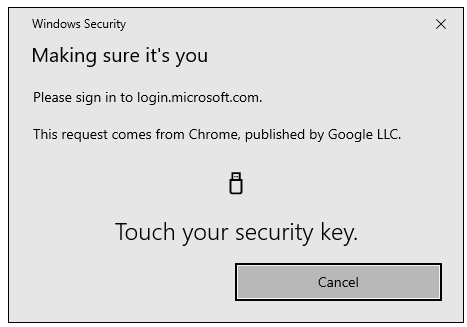
Touch the YubiKey sensor
If you have multiple accounts registered on your YubiKey, select your work account. This step only appears if the same key is registered with more than one Microsoft account.
Choose your account (if applicable)
You've signed in using your YubiKey without entering a password. Your account is now protected by phishing-resistant, passwordless authentication.
You logged into Microsoft 365 using only your YubiKey and PIN—no username or password required. This makes your account significantly more secure against phishing attacks.
Successfully signed in
If you run into any issues during setup, our IT support team is ready to help.